Showing posts with label Recipes. Show all posts

Wednesday, May 20, 2009

Sausage and Greens

My blog program has been acting up lately so I haven't posted because I haven't had the time or want to deal with it. I actually tried to post yesterday but the formatting got totally screwed, so hopefully I can muddle through it today.

This year is the first year my husband and I have had a real garden. It's our first home and the first time we've had space to do anything more than some potted tomatoes and herbs. We have mountains of zucchini that are nearly ready for harvest and lots of tomatoes and herbs. We also have collard greens, and lots of them. They were actually a mistake, my husband hates greens and I meant to plant broccoli. So I have been trying to find ways to use them so my husband will eat them and enjoy it.

I found this recipe for a sausage and collard green pasta a few weeks ago and I tried it on myself. I love collard greens and pretty much any type of greens for that matter, so this was right up my alley. The pairing of the sausage gave the dish enough flavor so that the greens were not too bitter or overpowering. I'm going to try this dish on my husband tomorrow, hopefully with good results.

Ingredients:
1 bunch collard greens, about 1 lb. stems removed, cut in half lengthwise, then sliced crosswise into half inch slices ( I remove the full vein out because I think the texture is better)
3 T olive oil
1 T minced garlic (I used 2 cloves and will use 3 next time)
1 t hot pepper flakes (she says this is optional, but I think it is a must)
5 links hot turkey Italian Sausage 12 oz. ( I would say 1 link per person is about right, so I'll use 2)
Pasta (she uses 3/4 of a box or about 6 servings, I will probably use 1/2 a box)
salt-pepper to taste
Grated parmesan
Directions:
Bring small pot of water to boil, add sausage and cook at low boil 10 minutes
Let sausage cool and slice
Bring large pot of water to a boil, add sliced collards and boil 5-7 minutes, until tender
Remove collards from water, keep water in the pot and bring back to a boil
When water comes to a boil, add pasta and a small amount of salt and cook 9-10 minutes
Reserve 1 cup pasta water then drain pasta
While pasta cooks, in large skillet, heat 2 T olive oil and add sliced sausage and brown until well browned on both sides
Remove sausage and add remaining T olive oil and garlic and red pepper and cook 2 minutes, scraping bottom of pan to get browned sausage bits
Add collards and saute 2 minutes, then add pasta and enough cooking liquid to moisten dish, and cook 2 minutes more
Taste and season with salt and pepper
Serve hot with freshly grated parmesan cheese.

Monday, May 18, 2009

Flexible Caserole Recipe

I love lifehacker.com so much, even more so when they feature recipes or cooking tips. The feature today was on an easy and flexible casserole recipe.

Flexible Casserole Ingredients:

1 cup main ingredient (protein)
1 cup second ingredient (vegetable)
1-2 cups starchy ingredient (pasta, rice, etc)
1 1/2 cups binder (sour cream, milk, canned soup, etc)
1/4 cup "goodie" (cheese, nuts, butter, etc)
seasoning (salt, pepper, garlic, etc)
topping ( french fried onions, breadcrumbs, etc)

You can read the full article and cooking instructions at lifehacker.com and the simple dollar.

Thursday, May 7, 2009

Honey Pecan Pork Chops

A few nights ago I made a delicious and easy meal. We're talking under 10 ingredients, very little prep, and maybe 15 minutes total in cooking time. I think this dish will definitely be a repeat in our household. I found the recipe here.
I love pork and tend to do the same old meal over and over with it. I just started grilling it a few months ago which has helped to liven up the dinner repertoire. I love this meal because I'm really interested in 10 item or less meals now. I may have to add that as a new category because we all need a go to place for great quick and easy dinners.


Ingredients:
4 pork chops- pound thin with meat tenderizer
1/2 c flour
s & p to taste
2 T butter
1/4 c honey
1/4 c chopped pecans

Directions:
Melt butter in saute pan over medium heat
Mix flour and s & p and dredge chops so they are lightly floured on both sides
Add pork to pan and cook until browned ( 5-7 minutes on each side)
Remove pork from pan and add honey and pecans to the left over drippings
You can just pour the honey sauce on the pork chops, but I returned them to the pan to caramelize them. It was just great. I highly recommend this easy dish.
As you can see I served mine with mashed yams and steamed broccoli. The mashed yams just have a little butter, milk, and salt and the broccoli is steamed in water so total number of ingredients is exactly 10. Not too shabby.

Wednesday, May 6, 2009

Fool Proof Pie Crust

Here's a pie crust recipe from instructables.com that claims to be foolproof. I haven't tried it myself, but I think we all need fool proof recipes in our arsenal. Also, pie crusts are so versatile, you can make a savory or sweet dish. And the ingredients for pie crusts are normally in our cupboards or refrigerators so it's one of those things we can easily whip up and fill with something yummy. Maybe quiche or a vegetable pie would be nice for spring. Be creative.

Ingredients and directions from Instructables.com
To make two 9-inch crusts * 2 1/2 cups unbleached all-purpose flour * 1 teaspoon table salt * 2 tablespoons sugar * 12 tablespoons (1 1/2 sticks) cold unsalted butter, cut…

Process 1 1/2 cups flour, salt, and sugar in food processor until combined, about 2 one-second pulses. Add butter and shortening and process until dough just starts to co…

Sprinkle vodka and water over mixture. With rubber spatula, use folding motion to mix, pressing down on dough until dough is slightly tacky and sticks together.

Divide dough into two even balls and flatten each into 4-inch disk. Wrap each in plastic wrap and refrigerate at least 45 minutes or up to 2 days.

Once your dough is thoroughly chilled - as firm as a cold stick of butter - it's ready to roll out. Roll the dough out between two pieces of plastic wrap to prevent dough …

My New Obsession... Onion Marmalade

My boss made meatloaf sandwiches on Monday and one of the condiments she used was onion marmalade mixed with a bit of mayonnaise. It was like heaven; slightly sweet, slightly tart with that wonderful earthy oniony taste. So I've been addicted ever since. Yesterday I had to have a grilled cheese sandwich with the addition of the marmalade.

I know I could go out and buy the stuff, but I've made jam before, so I decided to take a crack at it. I combined a few different recipes to fit my tastes.

About.com Onion Marmalade Recipe

Group Recipes Onion Jam Recipe

Recipe Zaar Red Onion Jam Recipe

Here's what I did


Red Onion Marmalade:

Ingredients:
2 Large red onions (chopped)
4 cloves garlic (chopped)
1 bottle white wine ( I used Charles Shaw Chardonnay because I think $2 wine is more than enough for a condiment)
1 c water
1/2 c sugar
2 T red wine vinegar
1 T olive oil
1 t salt
1/2 t pepper

Directions:

Heat medium, non reactive saucepan to medium low heat and add olive oil
Add chopped onions and garlic and saute, stirring often, until they become translucent, 10-15 minutes
Add remaining ingredients and cook covered for 30 minutes
Turn on exhaust fan, this can get stinky
Uncover pan and turn heat to medium
Cook an additional 45-60 minutes, stirring periodically to make sure nothing is sticking to the bottom, until the liquid has reduced and sauce seems syrupy
This will thicken more upon cooling as well

This should keep for a few weeks in a closed container. It can be used on a variety of meets as a condiment or addition to a sauce. I like it mixed with mayo, but it can also be mixed with cream cheese for a dip. Enjoy

Tuesday, May 5, 2009

5 Minute Ice Cream

Uh Oh, just looking at this made my thighs fatter.

5 minute ice cream

1 pkg frozen fruit

1/2 c sugar

2/3 c heavy cream

1 t vanilla

Place all ingredients in blender and mix until substance resembles ice cream

Thanks to http://www.instructables.com/ for this chilly delight

Friday, May 1, 2009

Rosemary Focaccia

I love focaccia and it is one of the easiest breads to make. It doesn't require much kneading and it really only needs one rise. It may be the high fat content in the bread, but whatever it is, it's darn good. It's basically a pizza dough without out the work and you can still top it with yummy things like kalamata olives, caramelized onions or just herbs, as I did. I served it along side a meal, so I just used rosemary from my garden as a topping.


I used Tyler Florence's recipe.

Ingredients:

1 pkg yeast
1 cup warm water (110-115 degrees)
2 T sugar
3 1/2 to 4 c flour
1 T salt
1/4 cup olive oil
2 T Rosemary
Cornmeal, for dusting
Cooking spray

Directions:

Proof yeast by stirring it in a large bowl with sugar and the warm water. If you have a standing mixer just put it in the bowl of the mixer for 5-10 minutes until it gets foamy.
Add the salt and stir to combine.
Add the flour a 1/2 c at a time.
Add the olive oil.
If you're using the stand mixer just turn it on medium for 5 minutes and let the mixer do the work, you will only need to knead for a minute at the end. If you are kneading the dough, just knead for 5 minutes on a floured surface until the dough is a little stretchy. Add flour if needed
Roll the dough into a ball and place into a bowl sprayed with cooking spray
Spray the top of the ball with cooking spray and cover with plastic wrap or wet towel
Let rise for 45 minutes until doubled
Spray cookie sheet with cooking spray and dust with cornmeal
Remove dough from bowl and stretch into an oblong shape and place on the sheet
Flatten it out somewhat uniformly then press finger prints into the dough
Sprinkle with rosemary
Preheat oven to 375 degrees
Cover dough with plastic wrap and let rest for 20 minutes
Remove plastic and bake on the bottom rack for 15-20 minutes

Wednesday, April 29, 2009

Pureed Kohlrabi

While at the farmer's market this weekend I decided I wanted to try out some new vegetables. One of the most interesting veggies was the kohlrabi; it looks like a little green heart with it's ventricles shooting out into leaves. It was so interesting to me I had to purchase it. I had never seen or heard of kohlrabi before and the person working the stand couldn't tell me much about it, but I knew that Google could. So into my canvas bag it went.
While searching for kohlrabi recipes I found many of the recipes used the kohlrabi only as an addition to a salad, soup or stew. I wanted it as a side dish, but I wanted it to play the main part. That's when I happened upon this recipe from Farmgirl Fare. She even says "For the only thing you should ever be doing with kohlrabi is turning it into puree. Trust me." I trust you Farmgirl, I do. So I began the process of pureeing kohlrabi.

Ingredients:
4 kohlrabi bulbs with leaves
2 Tablespoons extra-virgin olive oil1 large onion, chopped
3 cloves garlic, minced
1/2 c cultivated mushrooms (I used cremini and oyster), quartered
3 Tablespoons cream (or milk, chicken stock, olive oil, or water) I used skim milk
salt and pepper to taste

Directions:
*Trim the kohlrabi bulbs, peeling them if the skins seem tough. Rinse the leaves (discarding any that are yellow) pat them dry, and coarsely chop. Set aside. But the bulbs into 1-inch chunks.
*Bring a saucepan of lightly salted water to a boil, and add the kohlrabi chunks. Reduce the heat and simmer until tender, about 15 minutes.
*Meanwhile, heat the olive oil in a skillet. Add the onion and saute over medium-low heat until softened, about 5 minutes. Add the garlic and cook, stirring, another 1 to 2 minutes. Do not let garlic brown.
*Add the mushrooms and the reserved kohlrabi leaves to the skillet. Cover, and cook 5 minutes. Then uncover, and cook, stirring, until all the liquid has evaporated, 3 minutes. Set the skillet aside.
*Drain the kohlrabi chunks and place them in the bowl of a food processor
At this point she suggests blending everything together, but I blended the chunks alone and they turn into this beautiful light green puree with a lovely mild broccoli taste.
Then I added the dark green leave and mushroom puree mixture
*Transfer the puree to a saucepan and reheat over low heat, stirring, 2 minutes.
*Makes 6 portions

I will definitely make kohlrabi again. I think that next time I will use the leaves as greens and just use the bulb for the puree because it really was so tasty.

Tuesday, April 28, 2009

Spinach, Mushroom, and Sun-Dried Tomato Salad

My husband and I have recently started harvesting vegetables from our tiny home garden. We're still waiting for green beans, tomatoes and zucchini, but we have tons of spinach, collard greens, and herbs. So last night I made a wonderful spinach salad from our home grown harvest.
Spinach Salad
Ingredients:
2 c Spinach
1/2 c sliced mushrooms ( I used cremini, oyster and button)
1/4 c chopped onions
1/4 c halved pecans
1/4 c sun-dried or oven-dried tomatoes (see oven dried tomato recipe below)
1/2 T olive oil

Dressing:
3 T balsamic
3 T olive oil
1/2 t brown sugar
1 t seeded mustard
salt and pepper to taste

Directions:
Heat a saute pan to medium and add olive oil
Saute mushrooms and onions until golden
While mushrooms saute, whisk all ingredients for dressing
Place spinach in bowl and add mushroom mix while hot so spinach slightly wilts
Add tomatoes, pecans and toss with dressing

Note:
I called the tomatoes in this salad sun-dried but they are actually oven-dried. Oven drying tomatoes is a great thing to do with tomatoes that are on the edge of going bad; just at that wrinkled stage, if there is any rot present, they're toast. Keep in mind the drying process is low and slow so it can take 8-10 hours. I put them in an hour or 2 before I go to bed and just turn off the heat and let them sit in the warmth of the oven until I wake up.
Ingredients:
3 Tomatoes
1 T olive oil
Pinch Salt
Cooking spray
Parchment paper or tin foil
Directions:
Preheat oven to 200 degrees
Place parchment on cookie sheet and spray with cooking spray
Slice each tomato in 6 or 7 slices and place on parchment
Brush with olive oil
Sprinkle with salt
Cook for 1-2 hours then turn off heat (if they still look plump after an hour keep in longer)
Keep in oven 6-8 hours longer with heat off
These keep in the refrigerator for about 2 weeks. I put them in an old mason jar with extra olive oil.

Sunday, April 26, 2009

Blue Cheese Souffle...and Reconstructed Buffalo Wings

So what I was really craving for dinner on Saturday night was buffalo wings with celery sticks and creamy blue cheese dressing. But buffalo wings does not a meal make. Especially when it was my husband's first night home after his long project. So I decided to reconstruct the essentials of wings into a meal.


I decided to translate the blue cheese dressing into a blue cheese souffle.


The wings were a more literal translation; I stuffed a a chicken breast with a crunchy celery stuffing and sauteed it in butter and hot pepper sauce. I served it along with a baby green salad with a refreshing raspberry vinaigrette.

The blue cheese souffle was absolutely amazing and surprisingly easy to make. I have heard horror stories about souffles but I threw caution to the wind and gave it a whirl anyway. I think patience is the key to a good souffle. Keeping the heat low and slow seems to be really important. Also, not worrying about completely incorporating the fluffy egg whites into the yolk and milk mix is important. I didn't even really fold them in too much, just a quick flip over and figured it was enough...and it was. The souffle held it's height and it was fluffy and creamy and just plain wonderful.

Ingredients:

3 T unsalted butter, plus more for greasing ramekins
2-3 T grated Parmigiano-Reggiano cheese ( I didn't have this so I just used flour)
3 T all-purpose flour
1 c milk (I used skim)
5 egg yolks, lightly beaten
½ tsp. salt
freshly ground pepper, to taste
1 tsp. dry mustard powder (I was all out of this, so I used 1T prepared mustard, it was fine)
6 oz. blue cheese, crumbled (I used 4 oz blue cheese and 2 oz aged white cheddar)
5 egg whites

Directions:

Preheat oven to 350 degrees. Prepare the ramekins by rubbing the insides all over with butter. Divide the Parmigiano among the ramekins, holding them sideways and spinning them around to get the cheese to adhere to the sides. This gives the souffle something to cling to. ( This is where I used the extra flour)

In a medium saucepan over low heat, melt the butter. When it is completely melted and the foam subsides, add the flour as you whisk constantly to form a smooth béchamel sauce. Cook for about two minutes, whisking constantly, to remove the raw flour taste. Slowly add the milk as you continue to whisk until incorporated and slightly thickened. Remove the saucepan from the heat.

Whisk a small dollop of the hot butter-flour mixture into the egg yolks so they don’t cook when you add them to the saucepan. Now add the tempered yolks to your saucepan, whisking to incorporate. Add the salt, pepper and dry mustard. Whisk in the blue cheese.

In a large bowl, beat the egg whites with an electric mixer until they hold soft peaks. Add 1/3 of the egg whites to the saucepan and gently fold them into the cheesy mixture with a spatula. Add the remaining whites in two more additions, folding them in gently. It is not necessary to fully incorporate the egg whites. Since the goal of folding is to preserve as much of their volume as possible, it is okay to see small bits of whites in the mixture. Divide the souffle mixture evenly among the prepared ramekins. Bake, directly on your oven rack, for 25 minutes. The tops should form golden brown, jagged plateaus and the centers should jiggle ever so slightly. For the most beautiful presentation, serve immediately.

This recipe was adapted from Tyler Florence but I found it at aminglingoftastes.com. Also, I used 1 2 quart souffle dish, but according to A Mingling of Tatses, you can use 4 8oz ramekins or 6 6oz ramekins.

Thursday, April 23, 2009

Yogurt Honey Chocolate Bars


A few days ago my husband requested I make some cookies for him to take to work. He was going to take left over grapefruit cake but because of its girth, there was nowhere to store it. I wanted to make something fun and tasty that a bunch of dudes would like but I also wanted to try something a bit unconventional, so that's where the yogurt and honey got mixed in with the chocolate.

Okay, so this is basically a brownie with a yogurt custard on top. But when it bakes, the middle stays so moist, it's like a layer of cookie, a layer of fudge and a layer of custard. MMMMM.

Ingredients:

8 oz semi sweet chocolate chips
1 c butter (2 sticks) in pieces
1 1/3 c sugar
4 eggs
2 c flour
2 t vanilla extract
1 t baking powder
1/2 t salt

1 1/2 c plain nonfat yogurt
2 eggs
3 T flour
1/4 t vanilla extract
1/2 c honey
2 T sugar

Directions:

Line a 9 x 13" cake pan with parchment paper going up all sides and spray with cooking spray
In a double boiler or sauce pan, melt chocolate and butter over low heat
Preheat oven to 350
Remove from heat and beat in sugar, eggs and vanilla
Mix in flour, salt and baking powder until incorporated, but not over mixed
Spread into the lined pan

In another bowl mix yogurt, honey, flour, vanilla, sugar and eggs until smooth and creamy
Pour on top of brownie mixture
Bake for 45-55 minutes

I was making a large amount for a group of people but I imagine this can be halved and baked in an 8x8 pan for 25-30 minutes.

I think I might try lavender honey next time, just for kicks

Wednesday, April 22, 2009

Easy Grilled Potatoes in Preparation for National BBQ Month

When it's as hot as it's been I don't want to be heating up the house any more than it already is with cooking and baking. I think we get a little reprieve today; with the mercury rising only to the 80's, but it's good to have yourself armed with a variety of recipes that don't require a lot of heating...or that can be prepared outdoors. Also, May is National BBQ Month, so it might be a good idea to have some grill recipes up your sleeve to get ready for the celebration.


You can grill pretty much anything; vegetables, meats, breads and some fruits all do pretty well on the grill. Potatoes are really easy and they look so pretty when they're done.

Ingredients:

2 potatoes
1 T olive oil
Fresh herbs (rosemary, thyme, basil, sage...whatever you have on hand)
Salt and pepper to taste

Directions:

Preheat grill to 300-350 degrees or medium (if charcoal grill make sure the coal has started and it seems reasonably hot)
Scrub potatoes to clean
Don't completely slice the potatoes, but slice them 1/2 way in 1/2 inch increments
Microwave on high for 4-6 minutes (the potatoes should be nearly cooked but not completely)
Allow to cool for 5 minutes and slice completely
Brush slices with olive oil (or toss in a zipper baggy)
Season generously with fresh herbs
Cook on open grill 5 minutes on each side
Remove from grill and season to taste with S&P

The microwaving makes this go much quicker because potatoes can take a long time to cook. So if you're doing burgers or steak on the grill as well, you don't have to have the grill running for an hour before you put the meat on.

Tuesday, April 21, 2009

Cold Broccoli, Asparagus and Green Bean Soup

People don't normally think of soups when it's 100 degrees and sunny outside, as it is in Los Angeles this week. There are a variety of yummy soups that are great for warm weather such as gazpacho (tomato and cucumber) and vichyssoise (potato and leek) that are served cold. These soups are also fantastic accompaniments to salads and sandwiches.

I had a fantastic asparagus soup at a bridal shower over the weekend. Butter, cream, and asparagus, yummmm. I loved it so much I wanted to make it but with a bit of a variation, I wanted it cold. I also had a bunch of other green vegetables that needed to be eaten soon and I figured soup was a good way to use everything up.


Ingredients:
1 lb asparagus
1/2 lb broccoli
1/2 lb green beans
1 brown onion chopped
6 c low sodium chicken stock
1 c skim milk
1 1/2 T flour
2 T olive oil
1 t fresh thyme
1/4 lemon or 1 T vinegar
salt and pepper to taste

Directions:

Heat large pot or dutch oven over medium low heat with 1 T oil
Add chopped onion and cook for 5 minutes until onion starts to become translucent
Remove ends of asparagus and toss, remove tips and set aside 10 for garnish
Chop remaining asparagus into 1/2" pieces and add to pot
Cut green beans in 1/2" pieces and add to pot
Cut broccoli into small florets and add to pot, cook for 5 minutes
Add chicken broth and thyme and cook for 20 minutes
Remove from heat and blend soup in batches, transferring to another pot
Once soup is blended set aside
Heat a small sauce pan to medium low heat with remaining T of oil
Mix in flour, salt and pepper
Cook for 2 minutes but do not let it brown
Whisk in milk until dissolved and creamy, remove from heat
Heat vegetable puree back to medium and stir in milk mixture
Once the soup is slightly thickened remove from heat and stir in the lemon juice or vinegar
Allow to cool at room temperature for at least an hour then cool completely before serving
Garnish with asparagus tips

I wanted my soup right away, so I put a bowl in the freezer for 30 minutes, worked great. But if you are serving more than yourself, this is better made a day ahead. It also freezes well. Also, I had collard greens and spinach and I tossed those in the soup as well. It was pretty darn good.

Monday, April 20, 2009

Sandwich Bread

I've been doing a lot of baking lately; breads, cakes, tarts. All that yummy stuff that's full of butter, eggs, and other fattening things. I almost always try to sneak in some whole wheat flour, substitute sweetener or egg whites instead of yolks. But I was dying for a soft sandwich bread, so gave in to the temptation of just using white flour.

It was perfect, I highly recommend this recipe.

Ingredients:

1 1/4 c skim milk
1 pkg yeast
4 c all purpose or bread flour ( I used ap and it was fine)
2 T butter, melted
2 T sugar
1 t salt
cooking spray

Directions:
Heat the milk in the microwave for about 2 1/2 minutes or until the temp is 105-115 ( I usually start at 2 minutes and then check and reheat in 15 second increments)
Stir in the yeast and let it dissolve for about 5 minutes
Put the dry ingredients in a stand mixer or bowl and mix until everything is incorporated
Slowly add in the milk
Then add the butter
If the dough is too dry add extra milk 1 t at a time, if it's too moist, add flour 1T at a time
Turn the dough out on a floured surface and knead for about 5 minutes and roll into a ball
Coat a large bowl with cooking spray and add the dough ball and cover with plastic wrap
Allow to rise for about 90 minutes or until doubled in size
Punch down the dough in the bowl and form back into a ball
Allow it to rise again for an hour
Take a 9x5" loaf pan or cookie sheet and coat with cooking spray
If you are using the loaf pan, roll out the bread into a rectangle and place in the greased loaf pan to rise for 1 hour. Then slice down the length of the bread with a sharp knife
If just using a cookie sheet form the dough back into a ball and and place on greased cookie sheet to rise for 1 hour. Then slice across the top in a cross hatch pattern
Preheat the oven to 350 degrees
Spray top of bread with cooking spray
Bake for 45 minutes, or until golden and allow to cool before slicing

This is a great yeasty bread that slices really well. It's fluffy and light, and perfect for sandwiches or toast. I used this recipe from recipelink.

Thursday, April 16, 2009

Brown Derby Grapefruit Cake (or 4 hours and a bottle of wine)

I'm really lucky because my boss cooks lunch for me every day, so not only do I get free food, but I get free, AMAZING food. I don't know many people that get lamb stew or pork with cherries, sweet potatoes and Guinness for Lunch.

When I first started working with her, my husband, boyfriend at the time, said "That's awesome that she feeds you, but does she now how much you eat?" Ass. Anyways, she's also a culinary inspiration for me. She's always going through recipes and offering me copies of whatever she deems best. I often pass on the recipes because, although amazing, a lot are quite fattening and there are things I just don't need to be making.

Yesterday, however, I decided to take home a cake recipe, because sometimes you just need to bake a cake. Because the recipe is copied, I'm not sure where she got it from, but there is half an article attached, some cut off by being copied a few times and other parts continued on other pages. I tried to decipher it and one of my favorite parts in the article is:

"One of the most famous (recipes) was the Brown Derby's grapefruit cake. Owner Bob Cobb conceived it when gossip columnist Louella parsons threatened not to return until he put a non- fattening dessert on the menu. He told his cooks, "Put grapefruit on something, because everyone knows it's slimming."

This cake isn't slimming, just so you know. It's a lot lighter than a few cakes I've made, but it still has sugar, flour, oil and egg yolks, so I don't want anyone thinking this is healthy.


Oh, and did I mention this cake is fabulous. It's also a fabulous nightmare. I will post some tips at the end for fleshing or pithing a grapefruit, because that can be a lot of trouble. That is actually why I titled the post 4 hours and a bottle of wine. It took me 4 hours to make this cake and the pithing took close to an hour and drove me to drink. And I never do cakes like this; that require more than one bowl, lots of whipping, and lots of trouble. It was worth it though because it is a beautiful cake. I think next time I may do a whipped cream topping because the cream cheese is a tad too rich for this feathery light cake.

Brown Derby Grapefruit Cake

Ingredients:

2 1/4 c sifted cake flour ( I used regular flour and it worked just fine)
1 1/2 c sugar
1 T baking powder
1 t salt
1/2 cup vegetable oil
5 eggs yolks
8 egg whites
2 t vanilla
3 tablespoons grapefruit juice
2 t grated grapefruit rind
1/4 t cream of tartar

Directions:

Preheat oven to 325º F. Sift together flour, sugar, baking powder, and salt into mixing bowl. Make a well in center of dry ingredients.
Add oil, egg yolks, grapefruit juice, and rind. Beat until smooth.
Beat egg whites and cream of tartar separately, until whites are stiff but not dry.
Gradually fold egg whites into the cake batter, folding gently with a rubber spatula until just blended. Do not stir the mixture.
Pour into 2 greased and floured 10-inch cake pans. Bake at 325º degrees for 45 to 55 minutes, or until cake springs back when lightly touched with a finger. Invert pan on cake rack until cool. Run spatula around edge of cake. Carefully remove from pan.

Grapefruit Cream Cheese Frosting

3 eight oz pkgs cream cheese
2 t grapefruit juice
1 1/2 t grated grapefruit rind
1 cup powdered sugar (sifted)
2 grapefruits peeled with pith and membrane removed
*crush 6 sections for frosting and reserve the rest for topping

Let cream cheese soften at room temperature. Beat cheese until fluffy.
Add grapefruit juice and rind.
Gradually blend in sugar. Beat until well blended.
Add crushed grapefruit and blend into frosting.
Frost Bottom layer of cake
Frost top and sides
Garnish with remaining grapefruit sections

I had major problems pithing the grapefruit, it all fell apart. I was able to salvage some so don't make the mistake I did on pithing the grapefruit. Here are instructions on doing it correctly

How to flesh a grapefruit

The original recipe actually used canned grapefruit slices, which I will definitely use in the future. Try this, you'll like it

Wednesday, April 15, 2009

Wonder Box and Vanilla Beans

For almost every holiday my mother in law sends me an awesome care package. When I was growing up my grandmother used to send these too, filled with toys, games, candies and odd yard sale finds; my parents always referred to them as "wonder boxes." I hadn't received one for more than 10 years, but then I married my husband.

My mother in law has a great eye for things and she seems to know exactly what I like. For instance, this package included new tongs (which I really needed), a citrus zester, a hand towel that perfectly matches the decor of my bathroom, some vegetable seeds, and dried spices. She also put in some sugar free peeps that were surprisingly delicious, but the spices are the reason I'm writing this post.

One of the containers she sent holds 2 Madagascar vanilla beans.


I have never used a vanilla bean in my life. I love vanilla bean ice cream and vanilla bean cake. I mean, come on, how could you not? But since I've only used vanilla extract, I'm a little worried about using the bean itself. I searched for a bunch of recipes, but they were a little mundane and if I'm actually going to use the bean, I want it to be for something reallllllly tasty.

So, I was looking for a really tasty recipe and what caught my eye instead, was an article on making your own vanilla extract. And it uses VODKA. If there's Booze, I'm so in.

Thanks to KitchenProject.com for the full recipe and step by step instructions:

How to Make Vanilla Extract

Ingredients:2 Cups (16 oz.) vodka You may also use Brandy, 6 Vanilla Beans
You can easily cut this recipe in half and use 3 vanilla beans and 1 cup of vodka, brandy or rum.
You can use any kind of bottle you want, but I do recommend glass.

Cut the vanilla beans the long way with a scissors except the last inch. This way the bean stays intact.

Pour the vodka into the container you will be making your extract in. Here you see a quart mason jar.

I like to use clear glass, so I can see how the extract is developing. The darker it gets the stronger the extract is. There is no exact time that the extract is done. I like to wait at least 8 weeks.


Put the cut beans in the vodka and push them down until they are completely covered. They usually won't go down completely on their own as you see in this picture, so they need to be pushed down even farther.
Cover the vanilla extract and let it sit in a cupboard out of the light. You will start to taste some vanilla flavor even after a few days. How long you let it sit is how potent your vanilla extract is.

After 8 weeks the vanilla extract has the nice amber color and I am pouring it into small bottles for gifts.
I like to put a vanilla bean in each bottle. This way the extract will keep gaining in flavor and you can tell them that by adding a little vodka when it is halfway used up will replenish your supply of vanilla. It will dilute it for a while but it will regain strength quickly.
Some people will add some simple sugar syrup to the extract to sweeten it. . This is what they do in most commercial varieties so it has a nice sweet aftertaste. I like to use a little dark rum in my extract instead.
(1 teaspoon per cup of vodka)

Thursday, April 9, 2009

Empanaditas

So yesterday was National Empanada Day, so it made sense to me to whip some up for dinner. I made cheater empanadas because I'm lazy. Real empanadas, which are just a hand pie, are made with a yucca flour crust or a pie crust type crust; I used won ton wrappers. Here is a link to make some more authentic empanadas.

Empanada Recipe

Here are mine:


INGREDIENTS:
1 pkg won ton wrappers
1 chicken breast
1/2 c salsa (I used verde, but any will do, and the less chunky the better)
1/2 c shredded cheese
2 T olive oil
1/8 t garlic powder
1/8 t onion powder
1/8 t chili powder
1/8 t cumin
pinch of salt


DIRECTIONS:
Heat 1 T oil in saute pan to medium
Season chicken with all spices and saute until nearly cooked (5 minutes)
While chicken is cooking remove won ton wrappers from package and cut into circles
*I used a large biscuit cutter and cut about 6 at a time
After 5 minutes remove chicken from heat and cut into tiny pieces
Add salsa to saute pan and cook with chicken until chicken is cooked and most liquid is absorbed Remove chicken mixture from heat and allow to cool slightly
Put about ½ t of shredded cheese in the middle of each won ton round
Then about 1 t of chicken mix on top of that
Wet the edges of the won ton wrappers slightly with water and fold over to make half circle pockets
Use a fork to crimp the edges and get a good seal
Brush the tops of the pockets with the remaining olive oil
Place in oven for 7-10 minutes just to let the empanaditas get golden, crispy, and warm

These were super tasty, but definitely a better appetizer than dinner. And, they're obviously just baked won tons that look like emapnadas. But they are so easy. It looks like a lot of directions, but you just fill them and bake them. I think it could make a really cool dessert accoutrement too. Maybe fill them with chocolate or cherries...Yummy, Dude.


Wednesday, April 8, 2009

Pantry Staples

I wrote in my previous post that I've been living out of the pantry and haven't been to the store, which was a lie because I totally made a beer run. But I haven't done any real shopping.

Last night I was totally craving bread to have with my dinner, and of course, had nada. I love to bake bread and I have a little baking station so I whipped some up. I used a sandwich bread recipe.


Bread Recipe
I switched it up a bit

INGREDIENTS:
1 T brown sugar
1 package dry yeast (about 2 1/4 teaspoons)
1 c warm skim milk (100° to 110°)
1 1/2 T butter, melted and cooled, divided (1 T for the dough and 1/2 for the top)
2 c AP Flour
1 c whole wheat flour
1 t salt
cooking spray ( I use an olive oil sprayer) Misto Olive Oil Sprayer

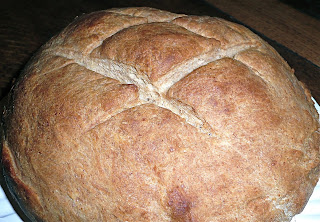
I mixed and let it rise per the instructions, but I always do a second rise, I think it helps with the flavor. Also, I decided to do a boule instead. I put corn meal on a baking sheet and dumped the risen ball on it. I let it rise again for 30 minutes and cut a diagonal pattern with a sharp knife. I preheated the oven to 450 but lowered it to 375 immediately when the bread went in. Then baked it for 30 minutes( I always check after 25.) It was totally yummy, I never make white bread, but I think I may try soon with this recipe because itwas delicious.

Dinner For One

So one thing about not having my husband home for meals is that I don't feel the need to go to the grocery store as often. I'm basically living off pantry staples and frozen foods, which is good because it's time for some new stuff.

For instance, last night I had the ends of all my pastas mixed together( farfalle, penne, black rice elbow macaroni...) aglio e olio with sauteed chicken and broccoli. It was nice and colorful and totally decent tasting. Also, aglio e olio is one of the easiest dishes ever. You actually feel like you're cooking something, but it takes just a few minutes, and the outcome is always superb.


Aglio e olio is basically garlic and red pepper flakes fried in oil...mmmmmm. It's so easy to make, you don't really need a recipe. You just heat 2T olive oil in a saute pan on medium heat. Add one clove chopped garlic and a few pepper flakes and saute until the garlic is golden and remove from heat.
Cook your pasta per package directions and reserve 2T of the salted water. Add salted water to the garlic oil, drain pasta, and toss everything together. Voila! That's pretty much just a one serving recipe, but you can multiply it to fit your needs.

Tuesday, April 7, 2009

Obama Fooodorama


If you haven't seen this site yet, you must. Whatever your political inclination, this site is great. It's much more than food, take a look:

Obama Foodorama

And here is the direct link to Michelle Obama's Shortbread Cookie Recipe